

New copiers I Scan & send
July 31, 2014
Tags: Copier, Email
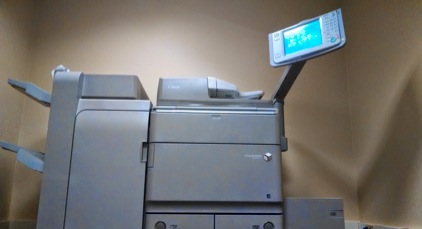
This summer, School District 21 replaced the existing Océ copiers in all of the schools with new Canon copiers. These copiers include the same functionality as the previous copiers with an even simpler interface.
Photocopies
Making photocopies can simply be done by clicking the “Copy” button on the touchscreen that is pictured further down below in the “Scan and Send” directions.
Scan and Send
The directions below outline the steps to scan a paper document and send it to your email.
Place the original paper document in the feeder (face up) or on the glass plate (face down).
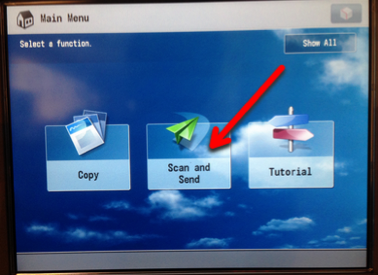
On the touchscreen, press “Scan and Send” from the Main Menu screen as pictured below.
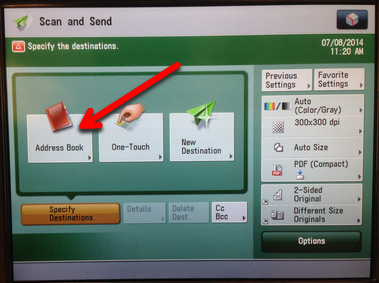
Next, you will need to look up the recipient’s email address (i.e., your email address) in the Active Directory Address Book. Press the “Address Book” button as pictured below.
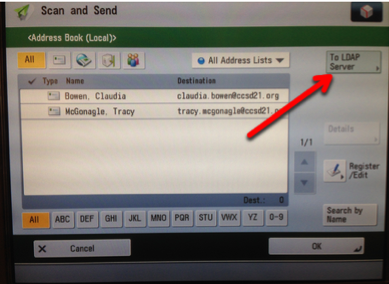
Now, click the button on the right side of the screen titled, “To LDAP Server”. (LDAP is a technical term for systems like Active Directory.)
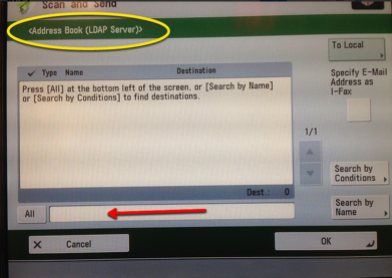
On the next screen, press in the long white text box at the bottom of the screen to the right of the “All” button as pictured below with the red arrow. This will bring up the on-screen keyboard.
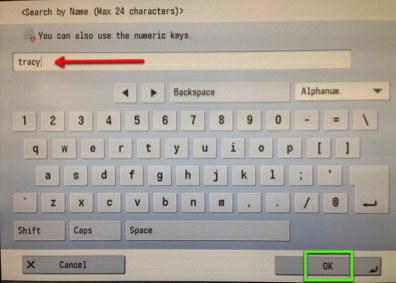
Using the on-screen keyboard, type the first name of the person to whom you want to send the email. Press the “OK” button after you have typed the first name of the recipient.
Each staff member with the first name that you have entered will show on the “Address Book (LDAP Server)” screen as pictured below.
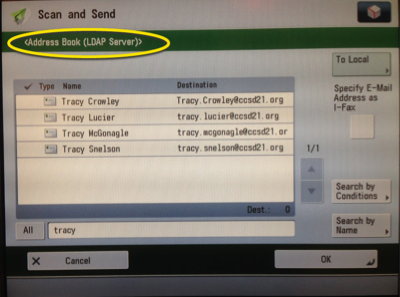
Press the name of the person on the screen to whom you want to send the scanned document. When you have selected the name of the individual, it will be highlighted in yellow and a checkmark will appear to the left of the individual’s name. After the name has been selected, click the “OK” button.
The screen will now display the name and email address of the person to whom the “Scan and Send” document will be sent.

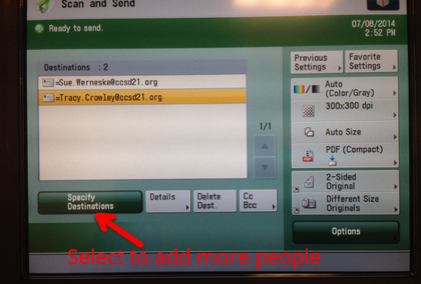
If you need to send the file to multiple people, press the “Specify Destinations” button as pictured below. You will continue with the beginning of the process to add individuals through the Address Book. If you do not need to add additional people, skip this step and continue to the step following the picture.
To actually scan and send the file, press the green physical “Start” button on the control panel (not on the touchscreen).
Then, after your paper document has scanned, simply take your papers and head to your computer to see your electronic file.
Topic: Tech Tips
Each District 21 school is named after an American author, and learning and literacy is at the center of our Professional Learning Community. The Modern Pen provides a collaborative location in which District 21 teachers can come together to learn the skills that will enable their students to learn new skills and to understand concepts at an even different level than before.
 Preparing all students for success