

Writing in Other Languages
November 2, 2014
Tags: Chrome, Google Apps, Google Docs, Google Drawing, Google Drive, Google Slides, Lenovo, Staff, Staff Laptop, Windows
Living in a the small global community that exists in our world today requires most people to have proficiency in multiple languages and to be able to use devices across those languages. Previously, instructions have been provided regarding how to use Mac OS X in languages (Typing en Español and 1 Computer, Multiple Languages) other than English and how to work in a variety of languages in Chrome OS(Google Translate Extension and Chrome OS in other languages). Windows, of course, can also work in multiple languages.
Using multiple languages within Google Apps
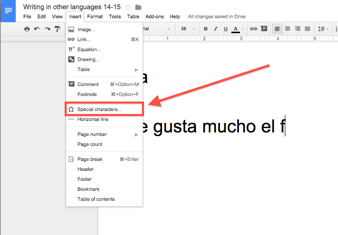
Without making any changes to your Windows computer, you can add special characters within Chrome in Google Docs, Google Slides, and Google Drawing. To add a special character in any of these Google Apps Chrome applications, simply select the “Special characters” option from the “Insert” menu as pictured below.
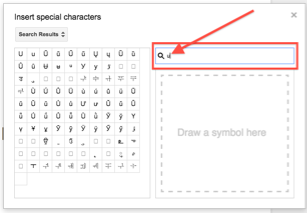
Within the “Special characters” dialog, there are pull-down menus to help you quickly find everything from letters to mathematical symbols to emoticons.

You can also use the “Search” box to more quickly narrow your search of existing characters as pictured below.
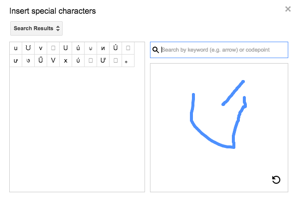
Finally, you can draw your symbol, and Google will search for similar symbols and present those to you as pictured below.
Adding a language to Windows
There are two methods for adding languages to your computer through Windows. Both essentially accomplish the same thing and are listed below.
Adding languages with the traditional Control Panel
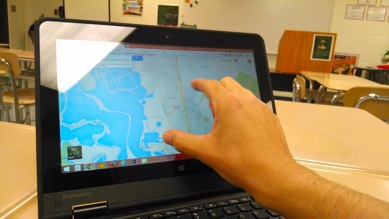
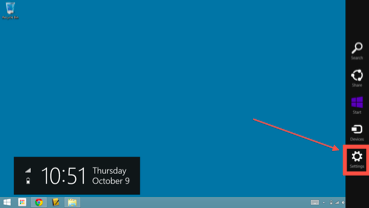
Swipe the Charms in from the right side of the touchscreen as pictured below. Click the “Settings” button at the bottom of the Charms
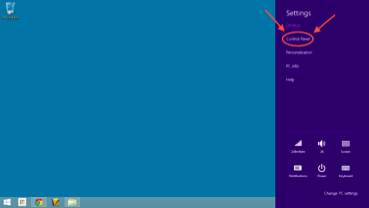
In the Settings pane on the right side of the screen, click the “Control Panel” link from near the top of the list of options as pictured below.
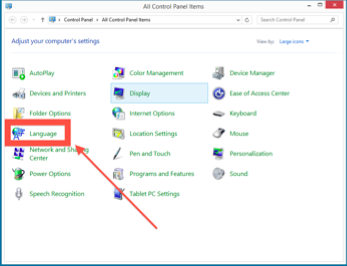
The “Control Panel” dialog will appear in the middle of the screen. Choose “Language” from the left side of the Control Panel.
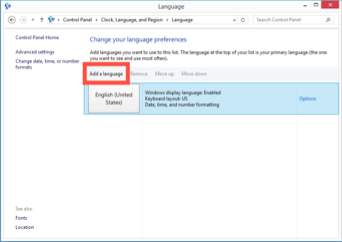
In the Language dialog, you will select the “Add a language” option from the top as pictured below.
On the next screen, you can scroll down to search for your language from the long list as pictured below, or…
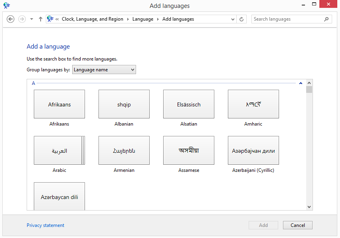
…You can use the “Search languages” box in the upper-right corner to find your language as pictured below.
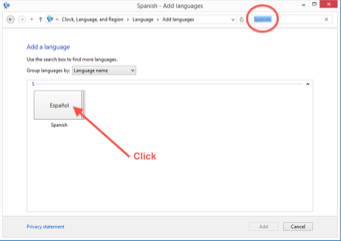
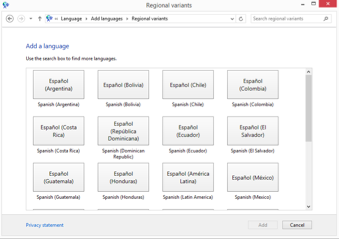
Regardless of which method you use to find your language, click the language card to select that language. When you select certain languages, such as Spanish, additional localizations may be available. If so, an additional language selection screen will automatically appear. Select the specific localization you wish/need.
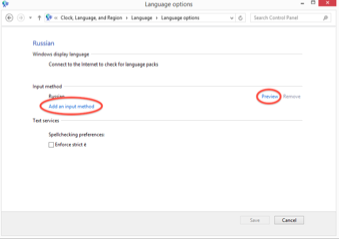
For languages that require significantly different characters from English, such as Russian, Polish, Japanese, Arabic, and others, continue on below. Select the “Options” link to the right of the specific language that will require a different input method as pictured below.
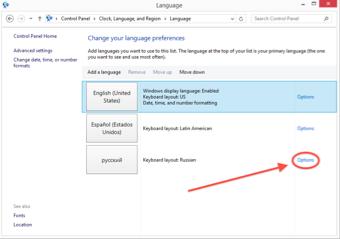
On this screen, you can “preview” the language by clicking the link on the right. Importantly, this is also where you will be able to “Add an input method” as pictured below.
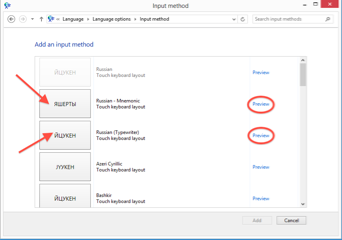
You can preview each of the input methods to determine which input method (or methods) will best serve you with typing in this language. Multiple input methods can be selected for a language if they are available as pictured below.
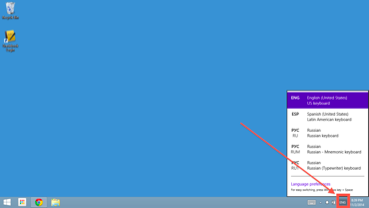
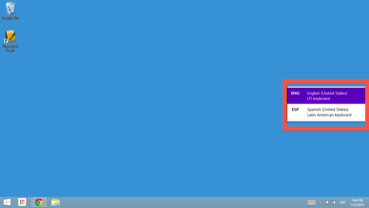
Finally, once you have selected a language other than an English as an additional input method, in the lower right corner of your screen, you will now see “ENG” appear in the Taskbar. By clicking on this, as pictured below, you will see the other input methods appear. Simply clicking on one of those other input methods will provide that to you.
If you have already completed the above steps, you need not continue any further. This is simply a different approach to accomplish the same task.
Adding languages with the Modern Windows 8 interface
Swipe the Charms in from the right side of the touchscreen as pictured below. Click the “Settings” button at the bottom of the Charms.

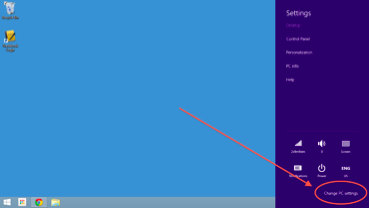
On the Settings pane, rather than selecting the Control Panel, select the option in the lower right corner of the screen to “Change PC settings” as pictured below.
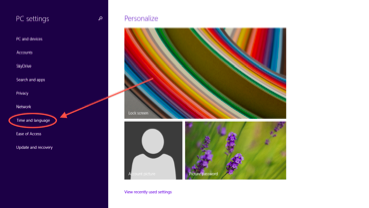
On the left side of this Settings page, select “Time and language” from the list of options as pictured below.
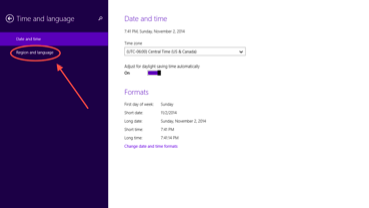
On the left side of the “Time and language” settings page, choose “Region and language” as pictured below.
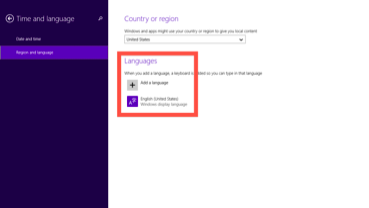
Select “Add a language” as pictured below in the middle of the page.
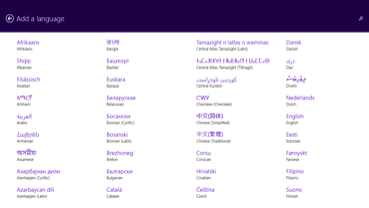
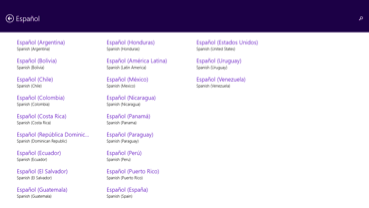
Scroll to the right using the touchscreen through the languages until you find the language that you want to select. Languages are in order by the first letter/sound of their name in English. (For example, Español falls further back in the list where you would expect “Spanish” to be located.)
When you select certain languages, such as Spanish, additional localizations may be available. If so, an additional language selection screen will automatically appear. Select the specific localization you wish/need.
Once you have selected your language, you can hit the Windows key on the physical keyboard in order to get back to the list of apps. On this screen, you can simply begin typing the word “Desktop”. You will see it appear on the Search pane that will appear on the right side of the screen. Click on the Desktop option, and you will return to the Desktop.
Once multiple languages have been selected, you can toggle between those languages on any screen by holding down the Windows key on the physical keyboard and tapping on the space bar as pictured below.
Topic: Tech Tips
Each District 21 school is named after an American author, and learning and literacy is at the center of our Professional Learning Community. The Modern Pen provides a collaborative location in which District 21 teachers can come together to learn the skills that will enable their students to learn new skills and to understand concepts at an even different level than before.
 Preparing all students for success