

Taking Screenshots in Windows 8.1
November 20, 2014
Tags: Lenovo, Screenshot, SnagIt, Staff Laptop, Windows
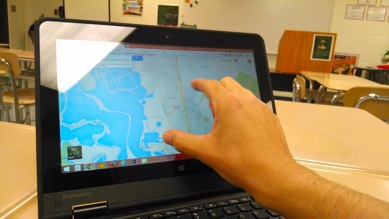
There are a variety of reasons why staff members need to take “pictures” of all or part of the screen on their laptop computers. Important on-screen items that staff members might take screenshots of include:
- a graph in Inform to be included in a year-end team summary or a student’s IEP
- a screenshot to illustrate to students or colleagues how to do a particular task within software or service
- a screenshot to attach to a Help Request showing a problem with your computer
On the Lenovo ThinkPad Yoga 11e, there are three effective ways to take a screenshot.
Within Chrome, SnagIt
While Google’s security rules for Chrome do not allow SnagIt to function on all types of websites, most of the time within Chrome, the best way to take a screenshot is by using the SnagIt extension, located to the right of the Omnibar in Chrome with the other extensions as pictured below.

SnagIt saves directly to a special folder that it creates in your Google Drive. This folder is titled, “TechSmith” after the Michigan-based company that creates SnagIt. With the now unlimited space available to Google Apps for Education school districts in our Google Drives, you can easily and safely store your screenshots in here in one step.
Additionally, SnagIt allows you to record screencasts!!!
This short CCSD21-created YouTube video explains SnagIt even further. Remember, SnagIt is also available to our students on their Chromebooks.
Snipping Tool–For a specific element of your screen
Windows also offers two different ways to take screenshots, and these will allow for pictures of anything on your screen–inside or outside of Chrome. To take a picture of a specific region of the screen, the best method is to utilize a built-in Windows utility entitled the “Snipping Tool”.
First, have what you want to take a screenshot of up on your screen.
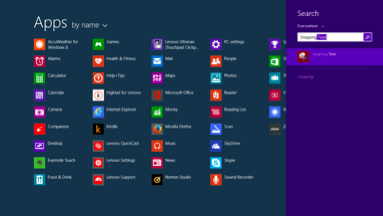
Then, hit the “Windows” button on your keyboard and begin typing the word “snipping”. When you do this, you will see the Search pane appear on the right side of your screen and the Snipping Tool appear within it as pictured below.
Click on the Snipping Tool and its icon in the Search pane on the right side of the screen to launch the Snipping Tool.
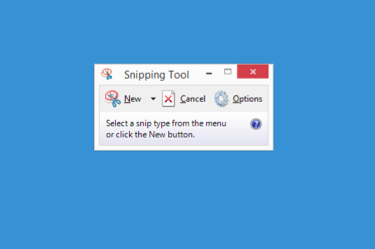
When the Snipping Tool launches, it will appear in the middle of your screen (pictured below), possibly right on top of what you want to capture in your screenshot. That’s okay! It will move out of the way on its own before you take your picture.
To take your screenshot, click the “New” button within the Snipping Tool.
A crosshairs will appear (like a “+” symbol), and you can click-and-drag this diagonally to capture the region of your screen you want included in the screenshot.
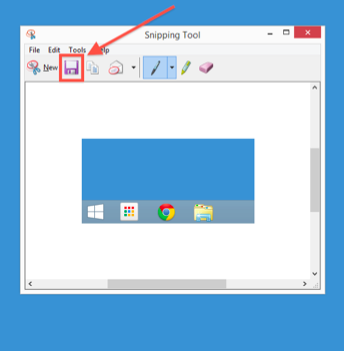
When you lift off on the mouse button, it will capture your image and that will appear in a new dialog as pictured below. In that dialog, you can simply click the “Save” button (floppy disk picture), and then navigate to your Google Drive in order to save the screenshot in the appropriate location within your Google Drive.
Print Screen–Windows “old school” approach to screenshots
For many years, Windows has had a quick and simple method for capturing a screenshot of the entire screen called, “Print Screen”.
To capture a screenshot with this method, first set-up your screen as you want it to appear in the screenshot.
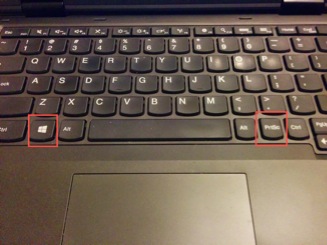
Then, on the keyboard, hold down the Windows button and click the PrtSc button as pictured below.
By default, the file will appear in a folder entitled, “Screenshots” that will reside within your “Pictures” folder. You can, and should, move the screenshot from there to the correct location in your Google Drive for permanent storage.
Topic: Tech Tips
Each District 21 school is named after an American author, and learning and literacy is at the center of our Professional Learning Community. The Modern Pen provides a collaborative location in which District 21 teachers can come together to learn the skills that will enable their students to learn new skills and to understand concepts at an even different level than before.
 Preparing all students for success